Web Express Logon Tutorial

Back Home Next


Step Step 1 of 11: Create the SSL key database file

Now that you have configured the DCAS, you must create an SSL key database file to store the DCAS client certificate information and the DCAS server's certificate (public key) information. When you configure the Credential Mapper Servlet in step 6, you will specify the name of this file as the value for the parameter CMPI_DCAS_KEYRING_FILE.

To create the keyring database file, use the Host On-Demand Certificate Management GUI on Windows and AIX platforms, or use a P12 keyring tool for other platforms. If you plan to use a P12 keyring tool, refer the the Planning, Installing, and Configuring Host On-Demand guide in the Host On-Demand V8 InfoCenter at http://www.ibm.com/software/webservers/hostondemand/ library/v8infocenter/.

In this scenario, the administrator takes the following steps to create a file called HODDCAS.p12 file on a Windows machine:

  1. Click Start > Programs > IBM WebSphere Host On-Demand > Administration > Certificate Management.

  2. Click Key Database File and select New. For the Key database type, select PKCS12. In the File Name field, type HODDCAS.p12. In the Location field, type C:\Program Files\IBM\HostOnDemand\HOD. Click OK.


    You may chose a different name and location if desired.


  3. Type the password in the Password and Confirm Password fields. Make a note of the password. Click OK.


  4. The next window allows you to add the DCAS server's certificate to the key database. Be sure that Key database content is set for Signer Certificates. If it is not, select the pull-down menu and change it. Click Add on the right side of the window.

  5. Select Binary DER data for the data type. If the server certificate is in ASCII format, select Base64-encoded ASCII data.

  6. Type the file name in the Certificate file name field, and type the path name in the Location field. Click OK.


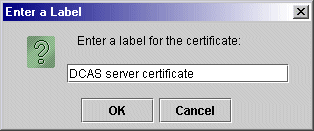
  7. Enter a label for the certificate and click OK.


  8. Add the DCAS client's certificate to the key database.

  9. Change the Key database content to Personal Certificates and click Export/Import.

  10. Select PKCS12 for the Key file type. Type the client certificate's p12 file name in the File Name field and the path name in the Location field. Click OK and enter the client certificate PIN.


  11. Click OK and exit the Certificate Management GUI.

Click Next to create your Host Credential Mapper (HCM) database.

BackHomeNext