Introduction to Specifications
ContentsThis chapter is organized as follows:
- Overview
- Displaying Specifications
- Editing Specifications
- Common Specification Elements
- Navigating the Tabs
OverviewA specification allows you to display and modify the properties and relationships of a model element, such as a class, a relationship, or an operation.
Some of the information displayed in a specification can also be displayed inside icons representing the model element in diagrams.
The specification fields are standard interface elements such as text boxes, list boxes, option buttons, and check boxes.
Displaying SpecificationsYou can display a specification in the following ways:
- Double-click an item in a diagram or browser.
- Click a diagram item, and then click Browse > Specification.
- Right-click an item, and then click Open Specification from the shortcut menu.
- Select the diagram item, and press ctrl+b.
Rational Rose displays a specification that corresponds to the selected item.
In order to view a specification when you double-click a logical or component package, you must turn off the Double-Click to diagram option. To disable this option, click Tools > Options. Click the Diagram tab. A check mark inside the Double-Click to diagram check box indicates the main diagram will be displayed when you double-click. If there is no check mark in the check box, double-clicking a logical or component package displays the package specification.
Custom Specifications
When you open the specification of an element that has an assigned language, a custom specification will be displayed if supported. If not supported, the standard Rose specification will be displayed.
The following specifications can be customized by language add-ins:
- Association
- Class
- Class Attribute
- Generalize
- Key/Qualifier
- Parameter
- Operation
- Component
- Class Instance
Editing SpecificationsIf you change a model element's properties or relationships by editing its specification or modifying the icons on the diagram, Rational Rose will automatically update the corresponding diagrams or specifications.
If a model element is write-protected or contained by a controlled unit that is write-protected, the OK button on the specification will be disabled to prevent the element from being modified.
Specifications can be resized by placing the pointer on a specification corner. Click and drag the specification to the desired size.
Specifications can also be printed by clicking File > Print.
Common Specification ElementsThe specifications share a number of common elements which are discussed on the following pages. For details on specific specifications and their unique elements, refer to the chapter specific to that specification.
Dialog Boxes
All specifications are presented in a dialog box format and contain tabs for navigating to specific pages or items. You can resize all specifications.
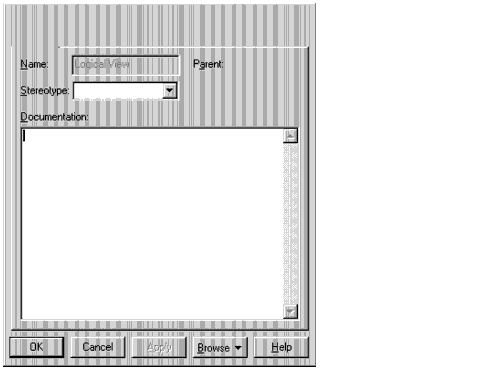
General Tab
The first tab presented in all specifications is labeled General and usually contains information such as Name and Documentation.
Figure 12 General Tab
Name
Every model element and each relationship can be labeled with a word or phrase that denotes the semantics or purpose of the relationship. You can enter the name in the diagram or in the Name field of a specification.
- If you enter the name in the diagram, Rational Rose displays the entry in the Name field.
- If you enter the name in the specification, Rational Rose displays the new name in the icon and updates the information in the model.
You can rename an element using one of the following methods:
- Change its name in the diagram or browser.
- Change its name in the specification.
Documentation
Use the Documentation field to describe relationships. The description can include such information as the roles, keys, constraints, purpose, and essential behavior of the element. You can enter information in the Documentation field in one of two ways:
- Enter text directly in the free-form text field.
- Click View > Documentation.
Rational Rose does not display this field in the diagram.
Note: If you document a class and identify the concepts or functions represented by the entity, you can use the field to form a basis of a more traditional data dictionary. You can also list the statements of obligation to provide certain behavior with the class. You can use this entry as a placeholder for the responsibilities of the class that you will determine during development.
Detail Tab
The Detail tab contains information specific to the model element you have selected.
Figure 13 Detail Tab
Files Tab
The Files tab allows you to insert new files or URLs, or view files and URLs already inserted or attached to your model element or diagram.
The Files tab is useful for maintaining links to supplemental documentation about the system being built (Vision Documents, GUI sketches, project plans, etc.).
Any attached URLs or files listed here are also displayed when the element or diagram is expanded in the browser.
Figure 14 Files Tab
Viewing Existing Files or URLs
If a file is already inserted, the file name and path are displayed on the tab. To open the document or go the Web site, double-click either the file name or path, or right-click the file name or path, and then click Open File/URL from the shortcut menu.
Inserting New Files
You can insert (or attach) files by:
- Using the drag-and-drop technique.
- Right-clicking in the text box, clicking Insert File from the shortcut menu, and navigating through the dialog box to locate your file.
Inserting New URLs
Right-click in the text box, and then click Insert URL from the shortcut menu; this will insert the default address www.rational.com. Edit the file name and path to point to the correct Web site.
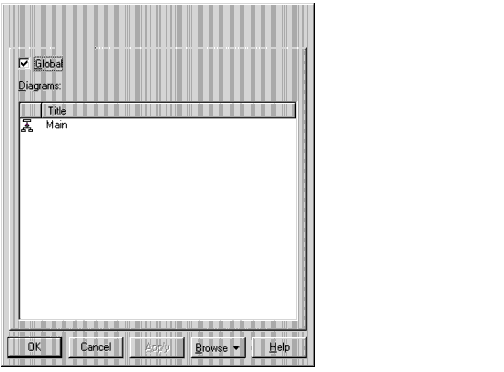
Tab Buttons
The bottom of each tab, regardless of type (General, Detail, etc.), contains five buttons to control the actions on each tab.
Figure 15 Tab Buttons
OK
Clicking OK applies the changes made to the specification, closes the dialog box, and returns focus to the diagram.
Cancel
Clicking Cancel ignores all changes made to the specification since the last Apply, closes the dialog box, and returns focus to the diagram.
Apply
Clicking Apply enacts the changes made to the specification and leaves the specification open.
Changes to a Specification field are not enacted until you click OK or Apply. These buttons are disabled if the model element is assigned to a controlled unit that is write-protected.
Browse
Clicking Browse displays four choices:
- Select in Browser, which highlights the selected item in the browser.
- Browse Parent, which opens the specification for the parent of the selected item.
- Browse Selection, which opens the specification for the currently selected item.
- Show Usage, which displays a list of all diagrams in which the currently selected element is the supplier, or in the case of a collaboration diagram, a list that shows the usage of a message.
Help
Clicking Help invokes the online Help topic related to the dialog box.
Navigating the TabsMany tabs contain lists of elements related to the specification. The lists typically consist of one row per related element. The rows are typically divided into columns, describing aspects of the rows (e.g. Filename and Path on the Files tab). To navigate between rows and columns in the list, either select the row and column with the pointer or use the arrow keys on the keyboard.
Adding and Deleting Entries
To insert a new row in a list, click Insert from the shortcut menu or press the insert key. An untitled entry is added.
To delete a row, select the row and click Delete from the shortcut menu or press the delete key.
Editing Entries
To edit a column in a row, select the column and press f8 or select the column twice with the pointer. Enter text into the column or select an entry from the drop-down menu (if available). After the column has been edited, either accept the change (by clicking outside the column or by pressing the enter or tab key) or cancel the addition (by pressing the esc key).
To open the specification for an element displayed in a list, select the row and column and click Specification from the shortcut menu or double-click the column. For example, double-clicking the Name column in the Relations tab of the class specification will open the specification for the relation, while double-clicking the End Class column in the same list will open the specification of the related class.
To reorder the rows in a list, select the row to be moved and drag it to the new location in the list. It is not possible to reorder rows in every list tab. To move an element in a list to another specification, the browser, or to an open diagram, select the row and drag it to the new location.
| Rational Software Corporation
http://www.rational.com support@rational.com techpubs@rational.com Copyright © 1993-2001, Rational Software Corporation. All rights reserved. |