
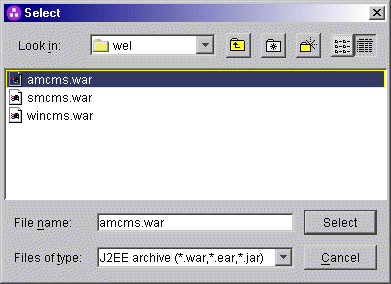
Now that you are familiar with the web.xml file, you are ready to edit it using WebSphere Application Server V5's Application Assembly Tool. In this step, you will edit two of the three default INIT CMS-related parameters that you became familiar with in the last step, and then add other required and optional debugging and DCAS parameters.
Helpful hint: Use this example of a completed web.xml as you edit and add parameters.
1. Edit the CMS-related INIT parameters.
In this step, you will edit two of the three INIT parameters in the web.xml file. You will not edit the CMPINetworkSecurity parameter name or value.
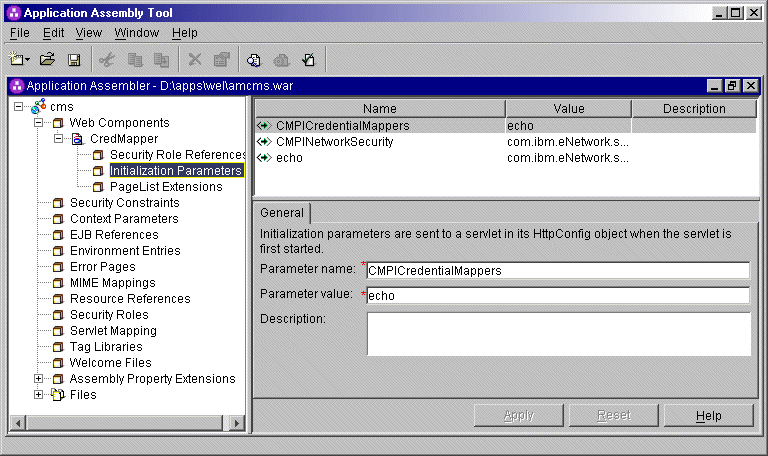
CMPICredentialMappers
parameter in the top panel of the window. In the Parameter
value field below, change the name of its current value (echo)
to the name of your HCM. In this scenario, the administrator specifies CMPIDCASPlugin
as the parameter value because he is using DCAS as his HCM. Optionally provide
a description and click Apply to replace the
value in the top window.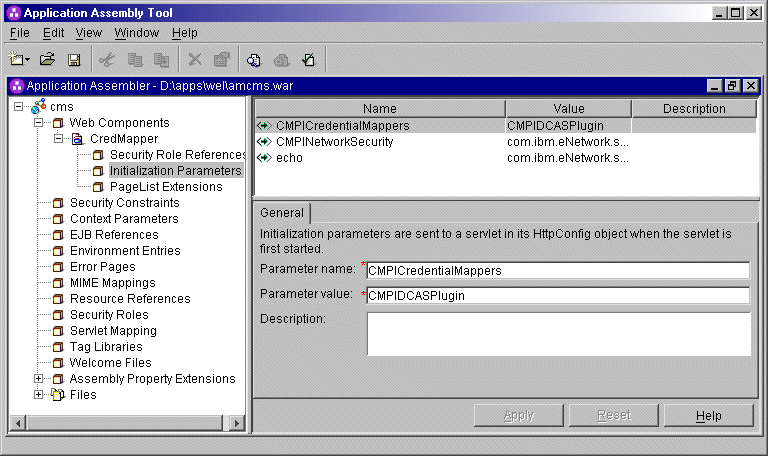
Code example:
<init-param>

       <param-name>CMPICredentialMappers</param-name>

       <param-value>CMPIDCASPlugin</param-value>

    </init-param>
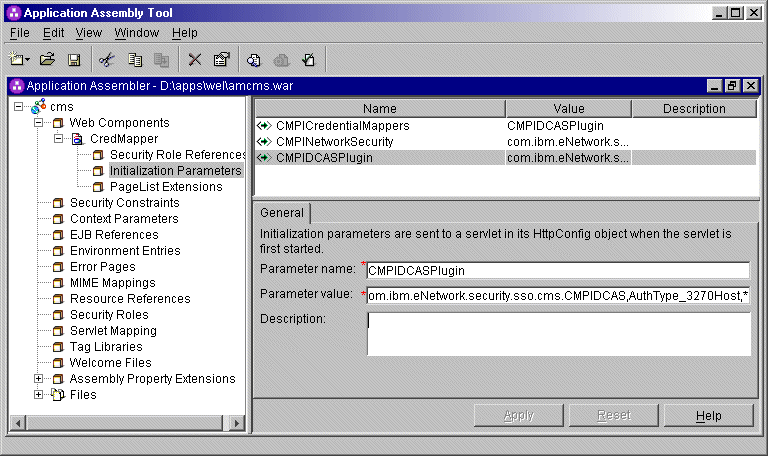
Highlight the echo
parameter in the top panel of the window. In the Parameter
name field below, replace the current parameter name (echo)
with the name of the parameter value that you specified for the HCM plug-in.
In this scenario, the administrator changed the parameter name to CMPIDCASPlugin.
Now, replace the parameter value
with a compound value that contains the full class path name of the implementing
class, the authentication type to be used by the HCM, and the host mask.
Separate these values with commas. In this scenario, the administrator added
com.ibm.eNetwork.security.sso.cms.CMPIDCAS for the full class
path name, AuthType_3270Host for the authentication type, and
* for the host mask. For
more a detailed description of full class path name, authentication type,
and host mask, refer to the Glossary of terms.
Optionally provide a description and click Apply to replace the value in the top window.
Code example:
      <init-param>

         <param-name>CMPIDCASPlugin</param-name>

         <param-value>com.ibm.eNetwork.security.sso.cms.CMPIDCAS,AuthType_3270Host,*</param-value>


      </init-param>
2. Add optional CMS-related debugging parameters.
To add new parameters, right-click Initialization Parameters in the left pane of the Application Assembly Tool window and select New. This displays the New Initialization Parameter window.
Add the following two optional debugging parameters to help you troubleshoot:
    <init-param>

       <param-name>CMPI_TRACE_LOG_FILE</param-name>


       <param-value>C:\Program Files\IBM\HostOnDemand\HOD\HODWEL.log</param-value>


    </init-param>
    <init-param>

       <param-name>CMPI_CMS_TRACE_LEVEL</param-name>


       <param-value>3</param-value>

</init-param>3. Add the required DCAS parameters for the CMPIDCASPlugin.
Adding the required DCAS parameters allows the HCM to map the user's network ID to his host ID and get a passticket from the DCAS application running on the host. The following DCAS are required in order for Web Express Logon to function properly. This section is divided into three subsections, A-C.
A. Add the following two HCM parameters to allow the client to connect to the DCAS securely:
- CMPI_DCAS_KEYRING_FILE
- This parameter references an SSL keyring database file that provides access to the DCAS client certificate as well as the DCAS server's certificate. The certificates establish a client-authenticated secure connection with the DCAS server. The DCAS plug-in serves as the DCAS client. You will create a keyring database file called HODDCAS.p12 in a future step.
Code example:
      <init-param>

         <param-name>CMPI_DCAS_KEYRING_FILE</param-name>


         <param-value>C:\Program Files\IBM\HostOnDemand\HOD\HODDCAS.p12</param-value>


      </init-param>
- CMPI_DCAS_KEYRING_PASSWORD
- This parameter specifies the password for the keyring database.
Code example:
      <init-param>

         <param-name>CMPI_DCAS_KEYRING_PASSWORD</param-name>


         <param-value>45ie8WciVu</param-value>

      </init-param>
We strongly recommend that you encrypt this parameter using the password encryption tool provided with Host On-Demand. The tool encrypts the password and then decrypts it so the HCM can use it. To learn more about how to use this tool, refer to Using the Password Encryption Tool.
B. The following parameters contain all the relevant information needed to connect to your HCM, which in this case is a JDBC database table created with IBM DB2. You can either configure access to an existing database or to a newly created one.
The level of security for the database depends on the database vendor. See the documentation for details.
- CMPI_DCAS_DB_ADDRESS
- This is a URL string that provides the address of the database. An example of this string is jdbc:db2://dtagw.raleigh.ibm.com:6789/HODSSO.
Code example:
      <init-param>

         <param-name>CMPI_DCAS_DB_ADDRESS</param-name>


         <param-value>jdbc:db2://dtagw.raleigh.ibm.com:6789/HODSSO</param-value>


      </init-param>
CMPI_DCAS_DB_NET_DRIVER- This string contains the name of the class that acts as the network database driver. An example of this string is COM.ibm.db2.jdbc.net.DB2Driver. The location of this class is assumed to be in the existing class path.
Code example:
      <init-param>

         <param-name>CMPI_DCAS_DB_NET_DRIVER</param-name>


         <param-value>COM.ibm.db2.jdbc.net.DB2Driver
</param-value>
</init-param>
CMPI_DCAS_DB_USERID- This is the ID of the user account to use when accessing the database. In this case, the user ID is
admin.
Code example:
      <init-param>

         <param-name>CMPI_DCAS_DB_USERID</param-name>


         <param-value>admin
</param-value>
</init-param>
CMPI_DCAS_DB_PASSWORD- This is the password of the user account to use when accessing the database.
We strongly recommend that you encrypt this parameter using the password encryption tool provided with Host On-Demand. The tool encrypts the password and then decrypts it so the HCM can use it. To learn more about how to use this tool, refer to Using the Password Encryption Tool.
Example:
      <init-param>

         <param-name>CMPI_DCAS_DB_PASSWORD</param-name>


         <param-value>*G5R%#**4T
</param-value>
</init-param>
CMPI_DCAS_DB_TABLE- This identifies the table to use for the needed query. In this case, the table is called
HACP.
Example:
      <init-param>

         <param-name>CMPI_DCAS_DB_TABLE</param-name>


         <param-value>HACP
</param-value>
</init-param>
C. The following parameters correspond directly to the column headings that you added to your HCM database table in Step 5: Establish your Host Credential Mapper. Recall that you added the following four column headings, all in uppercase: NETWORKID, HOSTADDRESS, APPLICATIONID, and HOSTID.
Based on the information provided by the first three of these parameters (network ID, host address, and the host application ID), you can make a SQL query of the database to get the host ID. The result of the query is entered in the host ID (HOSTID) column. Assuming that the query is successful, a call is made to the DCAS to request the passticket.
- CMPI_DCAS_DB_NETID_COL_NAME
- This entry identifies the name of the column that contains the network ID value (NETWORKID).
Code example:
      <init-param>

         <param-name>CMPI_DCAS_DB_NETID_COL_NAME</param-name>


         <param-value>NETWORKID</param-value>

      </init-param>
CMPI_DCAS_DB_HOSTADDR_COL_NAME- This entry identifies the name of the column that contains the host address value (HOSTADDRESS).
Code example:
      <init-param>

         <param-name>CMPI_DCAS_DB_HOSTADDR_COL_NAME</param-name>


         <param-value>HOSTADDRESS</param-value>

      </init-param>
CMPI_DCAS_DB_HOSTAPP_COL_NAME- This entry identifies the name of the column that contains the host application value (APPLICATIONID).
Code example:
      <init-param>

         <param-name>CMPI_DCAS_DB_HOSTAPP_COL_NAME</param-name>


         <param-value>APPLICATIONID</param-value>

      </init-param>
CMPI_DCAS_DB_HOSTID_COL_NAME- This entry identifies the name of the column that contains the host ID value (HOSTID).
Code example:
      <init-param>

         <param-name>CMPI_DCAS_DB_HOSTID_COL_NAME</param-name>


         <param-value>HOSTID</param-value>

      </init-param>
4. Add any optional DCAS parameters.
Unlike the previous set of DCAS parameters, the following parameters are optional. Which of these parameters you add to the web.xml file depends on your environment and your objectives as an administrator:
    <init-param>

       <param-name>CMPI_DCAS_TRACE_LEVEL</param-name>


       <param-value>3</param-value>

    </init-param>
    <init-param>

       <param-name>CMPI_DCAS_HOST_PORT</param-name>


       <param-value>8990</param-value>

    </init-param>
    <init-param>

       <param-name>CMPI_DCAS_USE_WELLKNOWN_KEYS</param-name>


       <param-value>true</param-value>

    </init-param>
    <init-param>

       <param-name>CMPI_DCAS_VERIFY_SERVER_NAME</param-name>


       <param-value>false</param-value>

    </init-param>
    <init-param>

       <param-name>CMPI_DCAS_REQUEST_TIMEOUT</param-name>


       <param-value>50000</param-value>

    </init-param>
    <init-param>

       <param-name>CMPI_DCAS_DB_PRESERVE_WHITESPACE</param-name>


       <param-value>false</param-value>
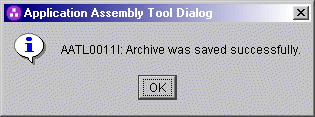
</init-param>On the Application Assembly Tool window, click File > Save to save your WAR file. If it saves successfully, this window will appear as a confirmation:
Click Next to deploy the CMS.
![]()
![]()
![]()